


Alright, let’s talk about your Showit website, specifically how to change a category link. I know, I know, it sounds a bit daunting, but stick with me, because we’re about to walk through this step-by-step. You’ll have that category link updated in no time, and the process is way easier than you’d think!
Step 1: Head Over to the Category Section Within Showit
First things first, you need to go to the category section within your Showit platform. Once you’re there, you’ll see options for creating or managing your categories. This is your starting point.

Step 2: Name Your Category
Think about what you want this new category to be called. Is it going to be “Wedding Photography,” “Lifestyle Tips,” or something else entirely? Give it a name that aligns with the content you’ll be posting under it.
Step 3: Visit Your WordPress Dashboard
Showit and WordPress are like besties that just can’t be separated. So now, hop on over to your WordPress dashboard. This is where the magic happens.
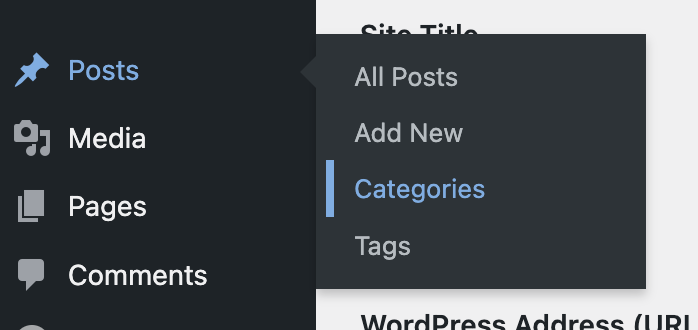
Step 4: Click on “Categories” Under “Posts”
You’ll see a sidebar in your WordPress dashboard. Look for the “Posts” section and then click on “Categories.” This is where you’ll be creating the new category you just named in Showit.
Step 5: Create Your Category
This is as simple as entering the name you decided on earlier. You can also add a description if you like, but that’s totally optional.
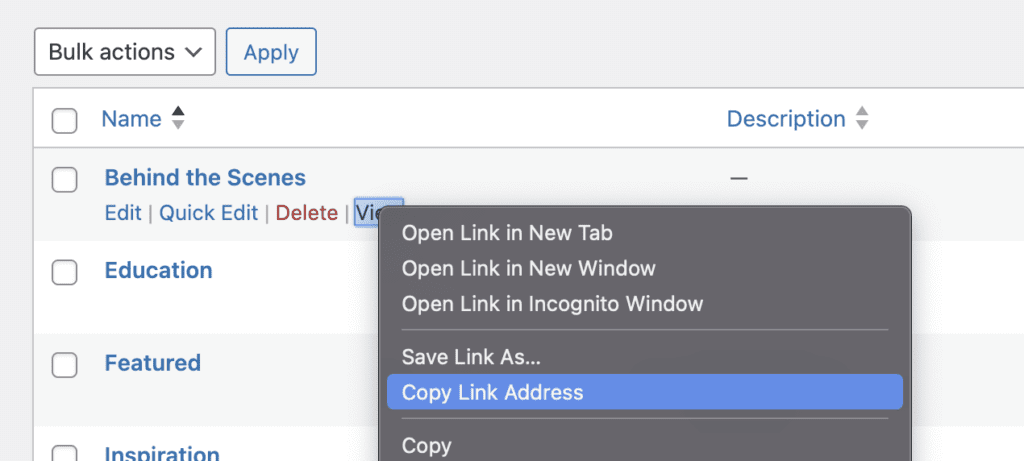
Step 6: Copy The “View” Link
Once you’ve created your category, you’ll notice there’s a “view” button next to it. Right-click on that button and copy the link. This is the URL you’ll be linking to in Showit.
Step 7: Back to Showit You Go
Go back to Showit and find those design elements you want to link to your new category. Highlight them because they’re about to get linked.
Step 8: Click on “Click Actions”
With your elements highlighted, look for the “click actions” option on the right sidebar. Yep, you guessed it, click on it.
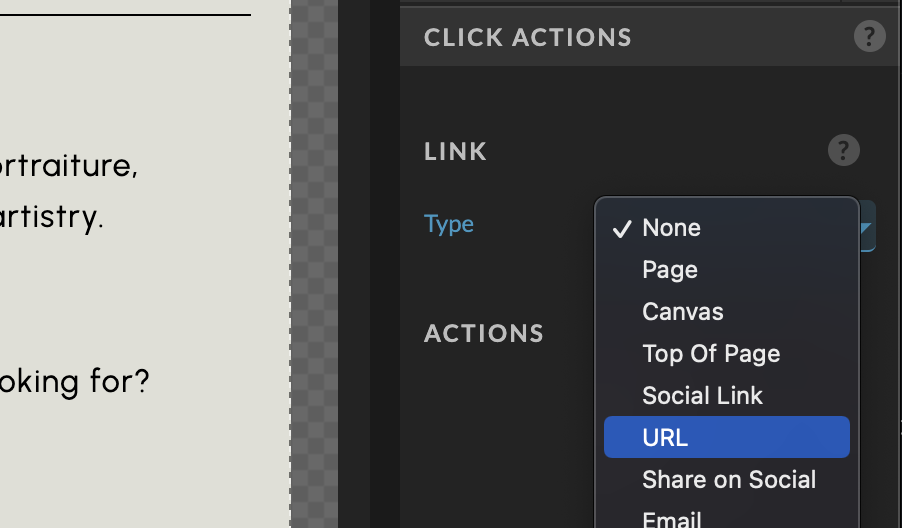
Step 9: Configure that Link
You’ll see a link section with a “type” optin. Hit it, and you’ll get a dropdown. If you’ve selected multiple elements, you’ll be shown a button that says “configure link”.
Step 10: Paste The URL and Save
Choose the “URL” option, paste the link you copied earlier from WordPress, and hit save. Yes, it’s really that simple.
Step 11: Publish to See the Changes
All that’s left to do is publish your Showit site to see your changes live. Hit that “Publish” button in the top right corner and do a little happy dance, because you, my friend, have successfully updated a category link within Showit.
And there you have it! A step-by-step guide to changing a category link in Showit. See? I told you it was easier than you thought it would be. Now go make your website even more awesome!

Highly sought-after in her niche, Gillian Sarah is the go-to expert for creating Showit websites for bloggers and influencers. Specializing in blogging and site monetization, she turns digital dreams into revenue-generating realities.


Add A Comment
VIEW THE COMMENTS